Binaries
This guide shows how to install the Dragonfly. Dragonfly can be installed either from source, or from pre-built binary releases.
Prerequisites
| Name | Version | Document |
|---|---|---|
| Git | 1.9.1+ | git-scm |
| Golang | 1.23.8+ | go.dev |
| Rust | 1.6+ | rustup.rs |
| Database | Mysql 5.6+ OR PostgreSQL 12+ | mysql OR postgresql |
| Redis | 3.0+ | redis.io |
Install Dragonfly
From the Binary Releases
Pre-built binaries are available on our Dragonfly releases page. These binary versions can be manually downloaded and installed.
Download the Dragonfly binaries:
Notice: your_version is recommended to use the latest version.
VERSION=<your_version>
wget -O dragonfly_linux_amd64.tar.gz https://github.com/dragonflyoss/dragonfly/releases/download/v${VERSION}/dragonfly-${VERSION}-linux-amd64.tar.gz
Untar the package:
# Replace `/path/to/dragonfly` with the installation directory.
tar -zxf dragonfly_linux_amd64.tar.gz -C /path/to/dragonfly
Pre-built binaries are available on our Client releases page. These binary versions can be manually downloaded and installed.
Download the Client binaries:
Notice: your_client_version is recommended to use the latest version.
CLIENT_VERSION=<your_client_version>
wget -O client_x86_64-unknown-linux-musl.tar.gz https://github.com/dragonflyoss/client/releases/download/v${CLIENT_VERSION}/dragonfly-client-v${CLIENT_VERSION}-x86_64-unknown-linux-musl.tar.gz
Untar the package:
# Replace `/path/to/dragonfly` with the installation directory.
tar -zxf client_x86_64-unknown-linux-musl.tar.gz --strip-components=1 -C /path/to/dragonfly
Configuration environment:
export PATH="/path/to/dragonfly:$PATH"
From Source
Clone the source code of Dragonfly:
git clone --recurse-submodules https://github.com/dragonflyoss/dragonfly.git
cd dragonfly
Compile the source code:
# At the same time to build scheduler and manager.
make build-manager && make build-scheduler

# Install executable file to  /opt/dragonfly/bin/{manager,scheduler}.
make install-manager
make install-scheduler
Clone the source code of Client:
git clone https://github.com/dragonflyoss/client.git
cd client
Compile the source code:
# At the same time to build dfdaemon and dfget.
cargo build --release --bins

# Install executable file to  /opt/dragonfly/bin/{dfget,dfdaemon}.
mv target/release/dfget /opt/dragonfly/bin/dfget
mv target/release/dfdaemon /opt/dragonfly/bin/dfdaemon
Configuration environment:
export PATH="/opt/dragonfly/bin/:$PATH"
Install Client using RPM
Step 1: Install Client
Download and execute the install script.
Notice: version is recommended to use the latest version.
wget -O dragonfly-client-{arch}-unknown-linux-musl.rpm https://github.com/dragonflyoss/client/releases/download/v{version}/dragonfly-client-v{version}-{arch}-unknown-linux-musl.rpm

rpm -ivh dragonfly-client-{arch}-unknown-linux-musl.rpm
Make sure to replace arch with one of the following:
x86_64aarch64
Step 2: Create Dfdaemon Configuration
Create the dfdaemon configuration file /etc/dragonfly/dfdaemon.yaml
and modify the manager.addrs in the configuration file to your actual address,
refer to dfdaemon config.
Option 1: Setup Dfdaemon as Seed Peer
# Seed Peer configuration.
manager:
  addr: http://dragonfly-manager:65003
seedPeer:
  enable: true
  type: super
  clusterID: 1
Option 2: Setup Dfdaemon as Peer
# Peer configuration.
manager:
  addr: http://dragonfly-manager:65003
Step 3: Run Dfdaemon with Systemd
Systemd starts dfdaemon service.
Notice:To start dfdaemon, you need to start the manager and scheduler first.
$ sudo systemctl enable dfdaemon
$ sudo systemctl start dfdaemon
$ sudo systemctl status dfdaemon
● dfdaemon.service - dfdaemon is a high performance P2P download daemon
     Loaded: loaded (/lib/systemd/system/dfdaemon.service; enabled; preset: enabled)
     Active: active (running) since Mon 2024-08-05 17:46:39 UTC; 4s ago
       Docs: https://github.com/dragonflyoss/client
   Main PID: 2118 (dfdaemon)
      Tasks: 13 (limit: 11017)
     Memory: 15.0M (max: 8.0G available: 7.9G)
        CPU: 83ms
     CGroup: /system.slice/dfdaemon.service
             └─2118 /usr/bin/dfdaemon --config /etc/dragonfly/dfdaemon.yaml --console
Step 4: Use Dfget to download files
Use Dfget to download files, refer to Dfget.
# View Dfget cli help docs.
dfget --help

# Download with HTTP protocol
dfget -O /path/to/output http://example.com/object
Install Client using DEB
Step 1: Install Client
Download and execute the install script.
Notice: version is recommended to use the latest version.
wget -O dragonfly-client-{arch}-unknown-linux-musl.deb
https://github.com/dragonflyoss/client/releases/download/v{version}/dragonfly-client-v{version}-{arch}-unknown-linux-musl.deb


dpkg -i dragonfly-client-{arch}-unknown-linux-musl.deb
Make sure to replace arch with one of the following:
x86_64aarch64
Step 2: Create Dfdaemon Configuration
Create the dfdaemon configuration file /etc/dragonfly/dfdaemon.yaml and modify the manager.addrs
in the configuration file to your actual address,
refer to dfdaemon config.
Option 1: Setup Dfdaemon as Seed Peer
# Seed Peer configuration.
manager:
  addr: http://dragonfly-manager:65003
seedPeer:
  enable: true
  type: super
  clusterID: 1
Option 2: Setup Dfdaemon as Peer
# Peer configuration.
manager:
  addr: http://dragonfly-manager:65003
Step 3: Run Dfdaemon with Systemd
Systemd starts dfdaemon service.
Notice:To start dfdaemon, you need to start the manager and scheduler first.
$ sudo systemctl enable dfdaemon
$ sudo systemctl start dfdaemon
$ sudo systemctl status dfdaemon
● dfdaemon.service - dfdaemon is a high performance P2P download daemon
     Loaded: loaded (/lib/systemd/system/dfdaemon.service; enabled; preset: enabled)
     Active: active (running) since Mon 2024-08-05 17:46:39 UTC; 4s ago
       Docs: https://github.com/dragonflyoss/client
   Main PID: 2118 (dfdaemon)
      Tasks: 13 (limit: 11017)
     Memory: 15.0M (max: 8.0G available: 7.9G)
        CPU: 83ms
     CGroup: /system.slice/dfdaemon.service
             └─2118 /usr/bin/dfdaemon --config /etc/dragonfly/dfdaemon.yaml --console
Step 4: Use Dfget to download files
Use Dfget to download files, refer to Dfget.
# View Dfget cli help docs.
dfget --help

# Download with HTTP protocol
dfget -O /path/to/output http://example.com/object
Operation
Manager
Setup Manager
Configure manager.yaml, the default path is /etc/dragonfly/manager.yaml,
refer to manager config.
Set the database.mysql.addrs and database.redis.addrs address in the configuration file to your actual address.
Configuration content is as follows:
# Manager configuration.
database:
  type: mysql
  mysql:
    user: dragonfly-mysql
    password: your_mysql_password
    host: your_mysql_host
    port: your_mysql_port
    dbname: manager
    migrate: true
  redis:
    addrs:
      - dragonfly-redis
    masterName: your_redis_master_name
    username: your_redis_username
    password: your_redis_password
    db: 0
    brokerDB: 1
    backendDB: 2
Run Manager:
# View Manager cli help docs.
manager --help

# Setup Manager, it is recommended to start Manager via systemd.
manager
Verify
After the Manager deployment is complete, run the following commands to verify if Manager is started,
and if Port 8080 and 65003 is available.
telnet 127.0.0.1 8080
telnet 127.0.0.1 65003
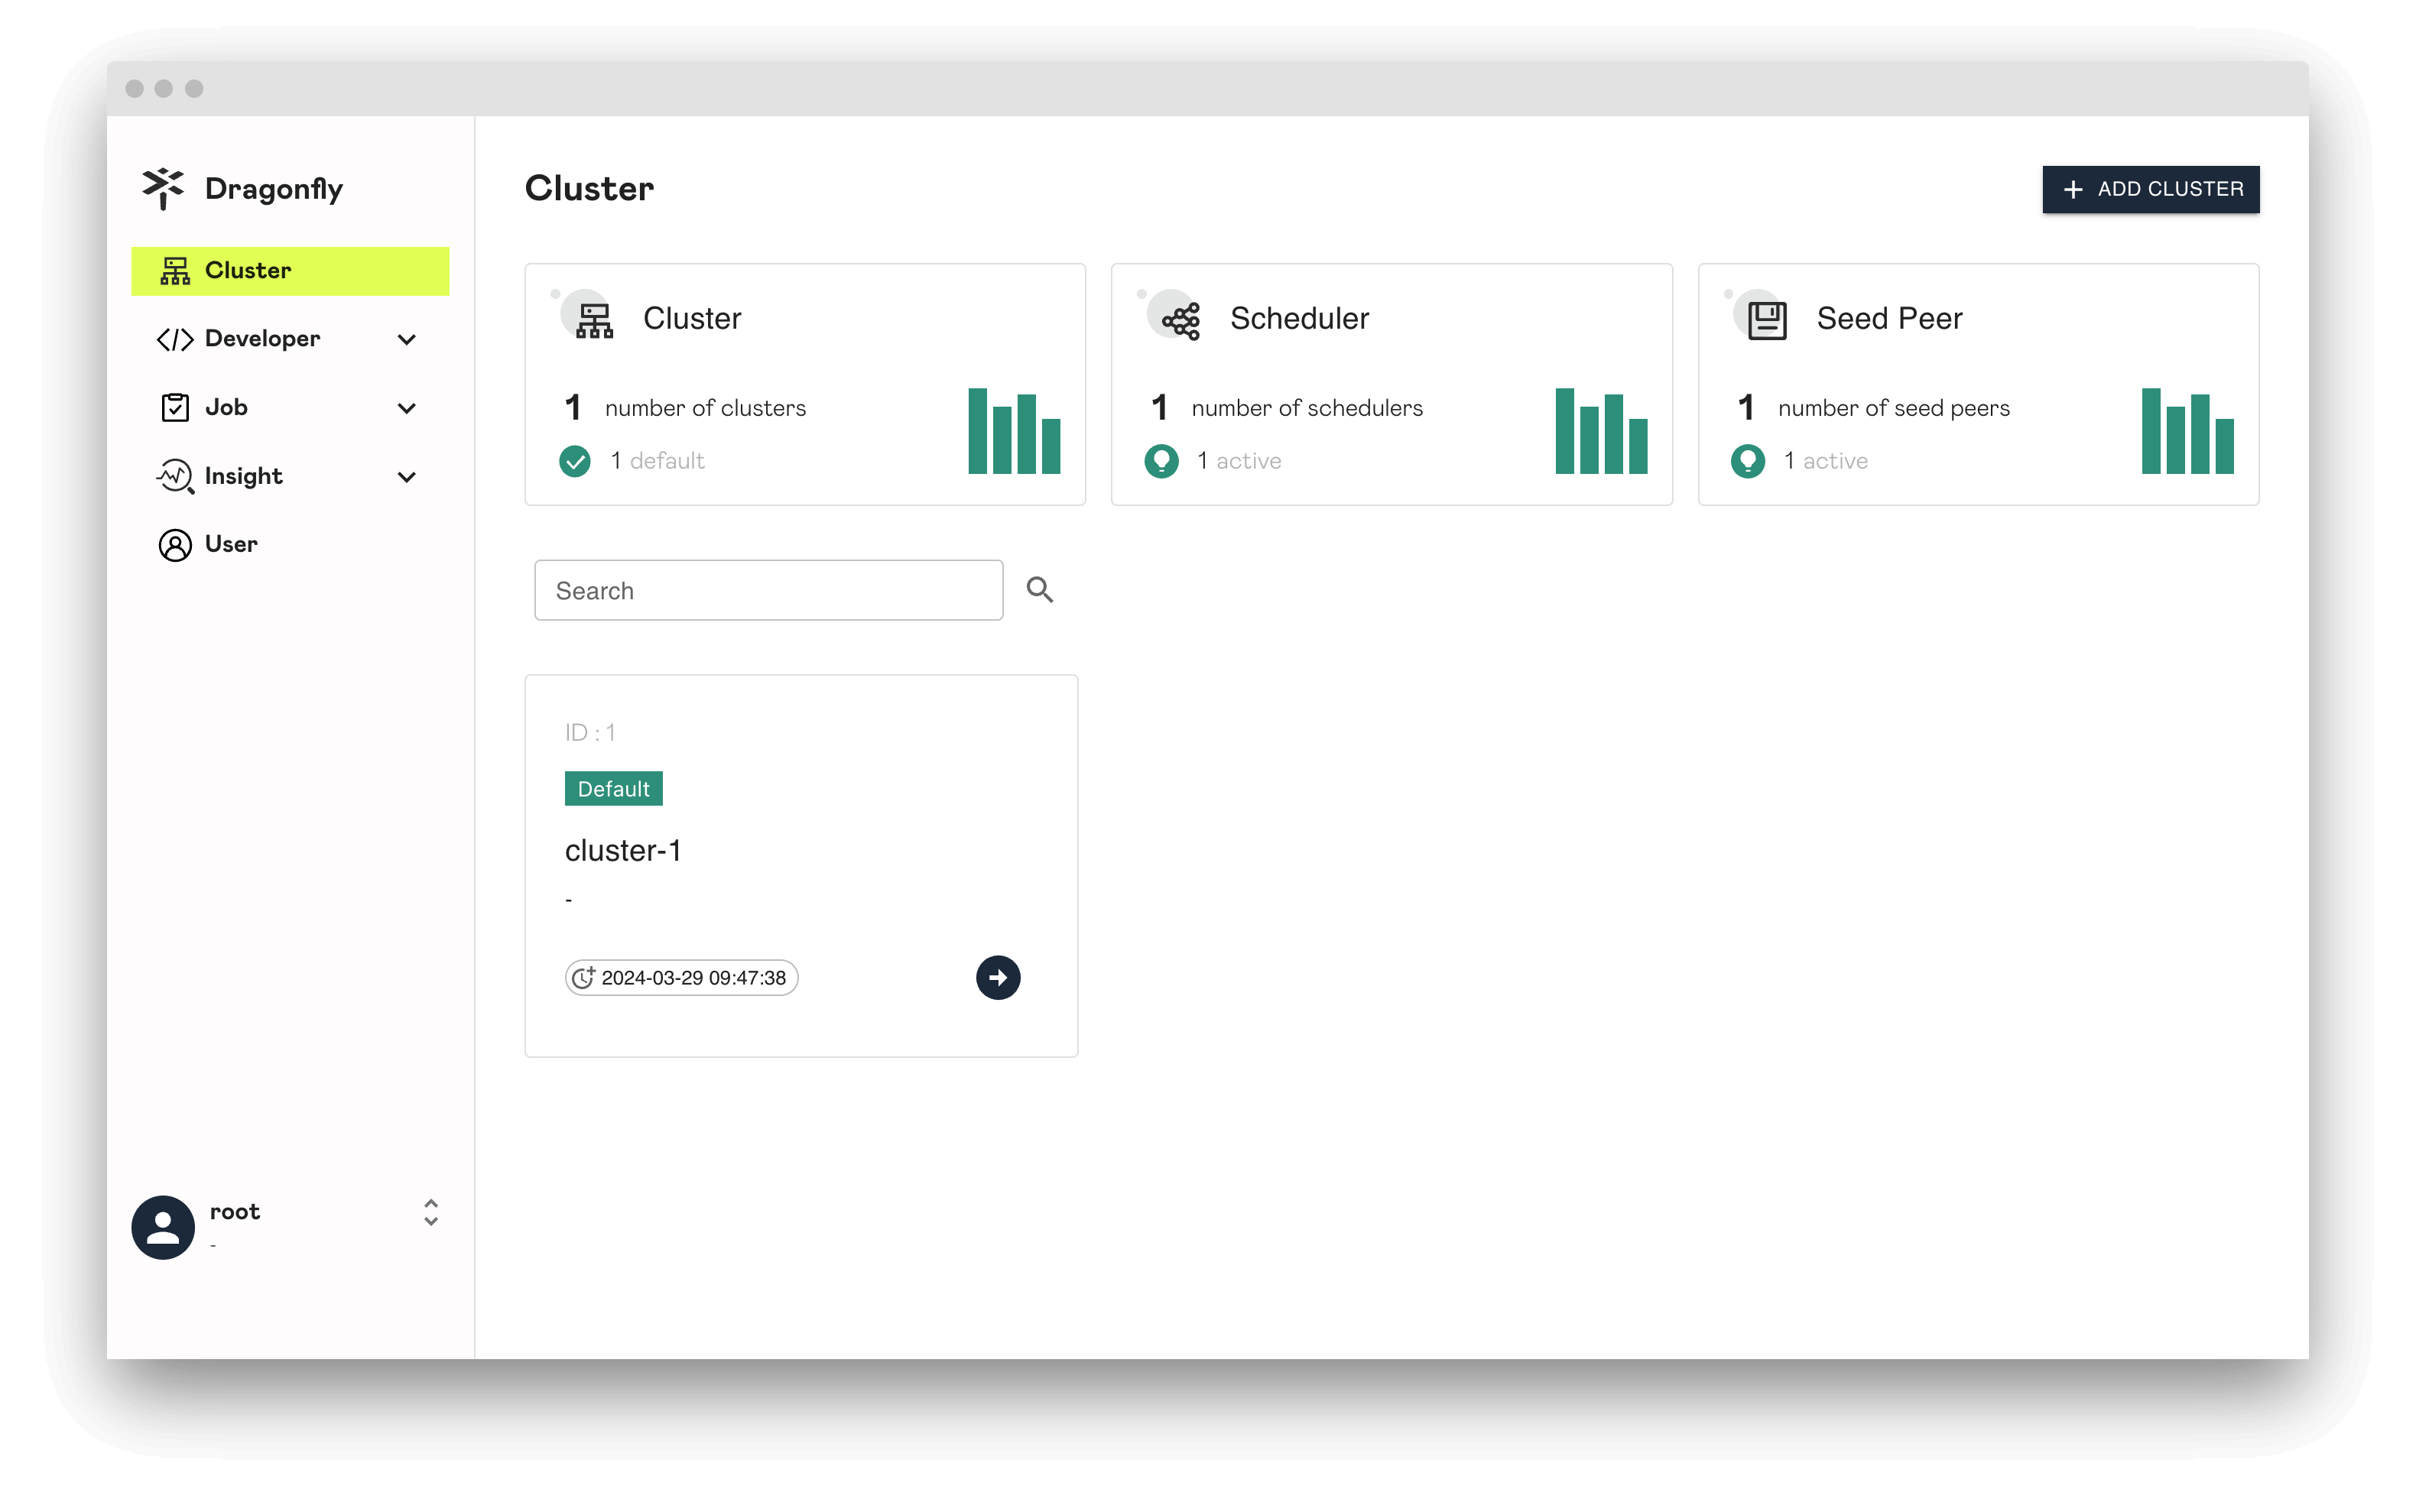
Manager Console
Now you can open browser and visit console by localhost:8080, Console features preview reference document console preview.
Scheduler
Setup Scheduler
Configure scheduler.yaml, the default path is /etc/dragonfly/scheduler.yaml,
refer to scheduler config.
Set the database.redis.addrs and manager.addr address in the configuration file to your actual address.
Configuration content is as follows:
# Scheduler configuration.
database:
  redis:
    addrs:
      - dragonfly-redis
    masterName: your_redis_master_name
    username: your_redis_username
    password: your_redis_password
    brokerDB: 1
    backendDB: 2
manager:
  addr: dragonfly-manager:65003
  schedulerClusterID: 1
  keepAlive:
    interval: 5s
Run Scheduler:
# View Scheduler cli help docs.
scheduler --help

# Setup Scheduler, it is recommended to start Scheduler via systemd.
scheduler
Verify
After the Scheduler deployment is complete, run the following commands to verify if Scheduler is started,
and if Port 8002 is available.
telnet 127.0.0.1 8002
Dfdaemon
Setup Dfdaemon as Seed Peer
Configure dfdaemon.yaml, the default path is /etc/dragonfly/dfdaemon.yaml,
refer to dfdaemon config.
Set the manager.addrs address in the configuration file to your actual address.
Configuration content is as follows:
# Seed Peer configuration.
manager:
  addr: http://dragonfly-manager:65003
seedPeer:
  enable: true
  type: super
  clusterID: 1
Run Dfdaemon as Seed Peer:
# View Dfdaemon cli help docs.
dfdaemon --help

# Setup Dfdaemon, it is recommended to start Dfdaemon via systemd.
dfdaemon
Verify
After the Seed Peer deployment is complete, run the following commands to verify if Seed Peer is started,
and if Port 4000, 4001 and 4002 is available.
telnet 127.0.0.1 4000
telnet 127.0.0.1 4001
telnet 127.0.0.1 4002
Setup Dfdaemon as Peer
Configure dfdaemon.yaml, the default path is /etc/dragonfly/dfdaemon.yaml,
refer to dfdaemon config.
Set the manager.addrs address in the configuration file to your actual address.
Configuration content is as follows:
# Peer configuration.
manager:
  addr: http://dragonfly-manager:65003
Run Dfdaemon as Peer:
# View Dfdaemon cli help docs.
dfdaemon --help

# Setup Dfdaemon, it is recommended to start Dfdaemon via systemd.
dfdaemon
Verify
After the Peer deployment is complete, run the following commands to verify if Peer is started,
and if Port 4000, 4001 and 4002 is available.
telnet 127.0.0.1 4000
telnet 127.0.0.1 4001
telnet 127.0.0.1 4002
Dfget
Use Dfget to download files, refer to Dfget.
# View Dfget cli help docs.
dfget --help

# Download with HTTP protocol
dfget -O /path/to/output http://example.com/object